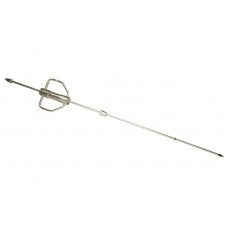
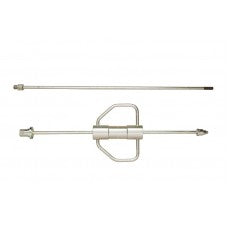
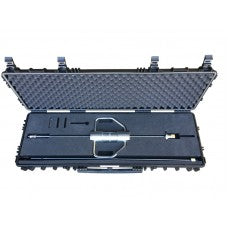
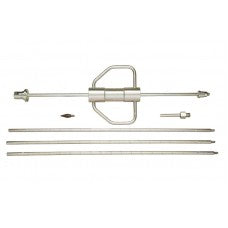
5615 Secondary Reference Temperature Standards,100 OHM, Cable LEN
(item no. 3002991, 3003004, 3003019, 3003028, 3003037, 3003043, 3003055, 3003062, 3055425, 3376938)
- Affordable wide-range accuracy
- Calibrated accuracy ± 0.012 °C at 0 °C
- Reference-grade platinum sensing element
- NVLAP-accredited calibration included, lab code 200706-0
For years, you’ve relied on our 5612, 5613, and 5614 Secondary Reference Probes. These field-durable, lab-accurate PRTs have been replaced by the 5615, which comes with a NVLAP accredited calibration.
The 5615-12 (formerly Hart Scientific) is a Platinum Resistance Thermometer (PRT) with an Inconel™ 600 sheath that’s 305 mm (12 in) long and 6.35 mm (0.250 in) in diameter. It is a secondary reference temperature standard designed to bridge the gap between the highest laboratory standards and industrial or second-tier lab locations. It has accuracy of ± 0.012 °C at 0.01 °C.
The element is constructed of reference-grade platinum wire (99.999 % pure) for excellent stability. The wire is wound in a coil and placed in a mandrel where it’s uniformly supported in a manner that virtually eliminates hysteresis. The electrical configuration is a four-wire current-potential hookup that eliminate the effects of lead-wire resistance.
These Inconel™-sheathed probes have a fully supported sensing element, making them more durable than SPRTs. The element is protected in an ultrahigh-purity ceramic case with a hermetic glass seal to improve output stability by locking out moisture and contaminants.
This probe comes calibrated with ITS-90 coefficients, making it compatible with many excellent readout devices, including Fluke Calibration’s 1529 Chub-E4, 1560 Black Stack, and 1502A Tweener. It bridges the gap between a 100-ohm industrial RTD and an SPRT.
For those needing faster thermal response, or where diameter and immersion depth are problems, order the 5615-9 or 5615-6. These probes are excellent reference probes for comparison calibrations in a Fluke Calibration dry-well. The sheaths of the 5615-6 and 5615-9 are 4.76 mm (0.188 in) in diameter.
A printout of sensor resistance is provided in 1 °C increments for each probe. The 5615-9 and 5615-12 are calibrated from –196 °C to 420 °C. The 5615-6 is calibrated to 300 °C.
We’ve tested many of the probes on the market. We’ve used them in our manufacturing facility and tested them in the lab, and this is an excellent secondary standards PRT. Other instruments on the market are priced much higher, have lower stability, or are of lower quality.
Remember, these are reliable instruments and each probe comes with its own individual NVLAP-accredited calibration, lab code 200706-0.
Specifications |
|||||||||||||||||
| Temperature range |
5615-12 and 5615-9: –200 °C to 420 °C 5615-6: –200 °C to 300 °C |
||||||||||||||||
| Nominal resistance at 0 °C | 100 Ω ± 0.10 Ω | ||||||||||||||||
| Temperature coefficient | 0.0039250 Ω/Ω/°C | ||||||||||||||||
|
Accuracy[1] |
± 0.024 °C at –200 °C ± 0.012 °C at 0 °C ± 0.035 °C at 420 °CC |
||||||||||||||||
| Short-term repeatability[2] | ± 0.009 °C at 0.010 °C | ||||||||||||||||
| Drift[3] | ± 0.007 °C at 0.010 °C | ||||||||||||||||
| Sensor length | 28 mm (1.1 in) | ||||||||||||||||
| Sensor location | 6.9 mm ± 3.3 mm from tip (0.27 in ± 0.13 in) | ||||||||||||||||
| Sheath dimensions |
5615-6: 152 mm x 4.76 mm (6.0 in x 0.188 in) 5615-9: 229 mm x 4.76 mm (9.0 in x 0.188 in) 5615-12: 305 mm x 6.35 mm (12.0 in x 0.250 in) |
||||||||||||||||
| Sheath diameter tolerance | ± 0.127 mm (± 0.005 in) | ||||||||||||||||
| Sheath material | Inconel™ 600 | ||||||||||||||||
| Minimum insulation resistance | 1000 MΩ at 23 °C | ||||||||||||||||
| Transition junction temperature range[4] | –50 °C to 200 °C |
||||||||||||||||
| Transition junction dimensions | 71 mm x 13 mm dia (2.8 in x 0.5 in) | ||||||||||||||||
|
Maximum immersion length |
5615-6: 102 mm (4 in) 5615-9: 178 mm (7 in) 5615-12: 254 mm (10 in) |
||||||||||||||||
| Response time[5] | 9 seconds typical | ||||||||||||||||
| Self heating (in 0 °C bath) | 50 mW/°C | ||||||||||||||||
| Lead-wire cable type | PTFE insulated with PTFE jacket, 22 AWG | ||||||||||||||||
| Lead-wire length | 183 cm (72 in or 6 ft) | ||||||||||||||||
| Lead-wire temperature range | –50 °C to 200 °C | ||||||||||||||||
|
Calibration |
NVLAP-accredited calibration included, lab code 200706-0. Please see calibration uncertainty table and its explanation of changeable uncertainties. |
||||||||||||||||
|
[1] Includes calibration and 100 hr drift (k=2) [2] Three thermal cycles from min to max temp, includes hysteresis, 95 % confidence (k=2) [3] After 100 hrs at max temp, 95 % confidence (k=2) [4] Temperatures outside this range will cause irreparable damage. For best performance, transition junction should not be too hot to touch. [5] Per ASTM E 644 |
|
||||||||||||||||
| Accessory | Description |
|---|---|
| 2601 |
Probe Carrying Case, Plastic |
| Product Manuals |
|---|
| 5615 Platinum Resistance Thermometer User’s Guide (94.6 KB) |
| Brochures |
|---|
| Free Reference PRT with Portable Bath Purchase Redemption Form (329.23 KB) |
| Data Sheets |
|---|
| Automated 7380 Temperature Calibration Systems Technical Data (776.81 KB) |
| Secondary Reference Temperature Standards Technical Data (572.5 KB) |
| Papers / Articles |
|---|
| An Investigation into the Stability of Industrial Platinum Resistance Thermometers (262.44 KB) |
| Shipping | This Item Ships from Fremantle, Perth, Western Australia |
Please allow 2 - 10 days for your order to arrive.
Although Most Stocked Products will generally Ship Overnight. We source products from all over the world to bring you epic offers and the lowest prices. This means sometimes you have to wait a little longer to get your order but it's always worth it!
Returns are easy.
simply contact us for a returns number and send your item to our returns centre for fast processing. We'll get you a replacement or refund in a snap!
Description
5615 Secondary Reference Temperature Standards,100 OHM, Cable LEN
(item no. 3002991, 3003004, 3003019, 3003028, 3003037, 3003043, 3003055, 3003062, 3055425, 3376938)
- Affordable wide-range accuracy
- Calibrated accuracy ± 0.012 °C at 0 °C
- Reference-grade platinum sensing element
- NVLAP-accredited calibration included, lab code 200706-0
For years, you’ve relied on our 5612, 5613, and 5614 Secondary Reference Probes. These field-durable, lab-accurate PRTs have been replaced by the 5615, which comes with a NVLAP accredited calibration.
The 5615-12 (formerly Hart Scientific) is a Platinum Resistance Thermometer (PRT) with an Inconel™ 600 sheath that’s 305 mm (12 in) long and 6.35 mm (0.250 in) in diameter. It is a secondary reference temperature standard designed to bridge the gap between the highest laboratory standards and industrial or second-tier lab locations. It has accuracy of ± 0.012 °C at 0.01 °C.
The element is constructed of reference-grade platinum wire (99.999 % pure) for excellent stability. The wire is wound in a coil and placed in a mandrel where it’s uniformly supported in a manner that virtually eliminates hysteresis. The electrical configuration is a four-wire current-potential hookup that eliminate the effects of lead-wire resistance.
These Inconel™-sheathed probes have a fully supported sensing element, making them more durable than SPRTs. The element is protected in an ultrahigh-purity ceramic case with a hermetic glass seal to improve output stability by locking out moisture and contaminants.
This probe comes calibrated with ITS-90 coefficients, making it compatible with many excellent readout devices, including Fluke Calibration’s 1529 Chub-E4, 1560 Black Stack, and 1502A Tweener. It bridges the gap between a 100-ohm industrial RTD and an SPRT.
For those needing faster thermal response, or where diameter and immersion depth are problems, order the 5615-9 or 5615-6. These probes are excellent reference probes for comparison calibrations in a Fluke Calibration dry-well. The sheaths of the 5615-6 and 5615-9 are 4.76 mm (0.188 in) in diameter.
A printout of sensor resistance is provided in 1 °C increments for each probe. The 5615-9 and 5615-12 are calibrated from –196 °C to 420 °C. The 5615-6 is calibrated to 300 °C.
We’ve tested many of the probes on the market. We’ve used them in our manufacturing facility and tested them in the lab, and this is an excellent secondary standards PRT. Other instruments on the market are priced much higher, have lower stability, or are of lower quality.
Remember, these are reliable instruments and each probe comes with its own individual NVLAP-accredited calibration, lab code 200706-0.
Specifications |
|||||||||||||||||
| Temperature range |
5615-12 and 5615-9: –200 °C to 420 °C 5615-6: –200 °C to 300 °C |
||||||||||||||||
| Nominal resistance at 0 °C | 100 Ω ± 0.10 Ω | ||||||||||||||||
| Temperature coefficient | 0.0039250 Ω/Ω/°C | ||||||||||||||||
|
Accuracy[1] |
± 0.024 °C at –200 °C ± 0.012 °C at 0 °C ± 0.035 °C at 420 °CC |
||||||||||||||||
| Short-term repeatability[2] | ± 0.009 °C at 0.010 °C | ||||||||||||||||
| Drift[3] | ± 0.007 °C at 0.010 °C | ||||||||||||||||
| Sensor length | 28 mm (1.1 in) | ||||||||||||||||
| Sensor location | 6.9 mm ± 3.3 mm from tip (0.27 in ± 0.13 in) | ||||||||||||||||
| Sheath dimensions |
5615-6: 152 mm x 4.76 mm (6.0 in x 0.188 in) 5615-9: 229 mm x 4.76 mm (9.0 in x 0.188 in) 5615-12: 305 mm x 6.35 mm (12.0 in x 0.250 in) |
||||||||||||||||
| Sheath diameter tolerance | ± 0.127 mm (± 0.005 in) | ||||||||||||||||
| Sheath material | Inconel™ 600 | ||||||||||||||||
| Minimum insulation resistance | 1000 MΩ at 23 °C | ||||||||||||||||
| Transition junction temperature range[4] | –50 °C to 200 °C |
||||||||||||||||
| Transition junction dimensions | 71 mm x 13 mm dia (2.8 in x 0.5 in) | ||||||||||||||||
|
Maximum immersion length |
5615-6: 102 mm (4 in) 5615-9: 178 mm (7 in) 5615-12: 254 mm (10 in) |
||||||||||||||||
| Response time[5] | 9 seconds typical | ||||||||||||||||
| Self heating (in 0 °C bath) | 50 mW/°C | ||||||||||||||||
| Lead-wire cable type | PTFE insulated with PTFE jacket, 22 AWG | ||||||||||||||||
| Lead-wire length | 183 cm (72 in or 6 ft) | ||||||||||||||||
| Lead-wire temperature range | –50 °C to 200 °C | ||||||||||||||||
|
Calibration |
NVLAP-accredited calibration included, lab code 200706-0. Please see calibration uncertainty table and its explanation of changeable uncertainties. |
||||||||||||||||
|
[1] Includes calibration and 100 hr drift (k=2) [2] Three thermal cycles from min to max temp, includes hysteresis, 95 % confidence (k=2) [3] After 100 hrs at max temp, 95 % confidence (k=2) [4] Temperatures outside this range will cause irreparable damage. For best performance, transition junction should not be too hot to touch. [5] Per ASTM E 644 |
|
||||||||||||||||
| Accessory | Description |
|---|---|
| 2601 |
Probe Carrying Case, Plastic |
| Product Manuals |
|---|
| 5615 Platinum Resistance Thermometer User’s Guide (94.6 KB) |
| Brochures |
|---|
| Free Reference PRT with Portable Bath Purchase Redemption Form (329.23 KB) |
| Data Sheets |
|---|
| Automated 7380 Temperature Calibration Systems Technical Data (776.81 KB) |
| Secondary Reference Temperature Standards Technical Data (572.5 KB) |
| Papers / Articles |
|---|
| An Investigation into the Stability of Industrial Platinum Resistance Thermometers (262.44 KB) |
Shipping
| Shipping | This item ships to |
Delivery & Returns
Please allow 2 - 10 days for your order to arrive.
Although Most Stocked Products will generally Ship Overnight. We source products from all over the world to bring you epic offers and the lowest prices. This means sometimes you have to wait a little longer to get your order but it's always worth it!
Returns are easy.
simply contact us for a returns number and send your item to our returns centre for fast processing. We'll get you a replacement or refund in a snap!
Reviews
6 Great reasons to buy from us:
-

30 Days Return
If your product is faulty or damaged under manufacture warranty, simply send it back to us and we'll cheerfully replace it or fix the problem for you. -

Returns are Easy
Simply contact us for a returns number and send your item to our returns centre for fast processing. We'll get you a replacement or refund in a snap! -

Best Price Guarantee
In the unlikely event that you find your item cheaper at another online store, just let us know and we'll beat the competitor's pricing hands-down. -

We guarantee your satisfaction
We insist that you love everything you buy from us. If you're unhappy for any reason whatsoever, just let us know and we'll bend over backwards to make things right again. -

100% Safe & Secure
Ordering from Laserman Technologies is 100% safe and secure so you can rest easy. Your personal details are never shared, sold or rented to anyone either. -

Best Laser Warranties in the Business
Laserman the Best Laser Level, Pipe Laser and Laser Measuring Warranties in the Business - Now thats unbeatable value !!.


